


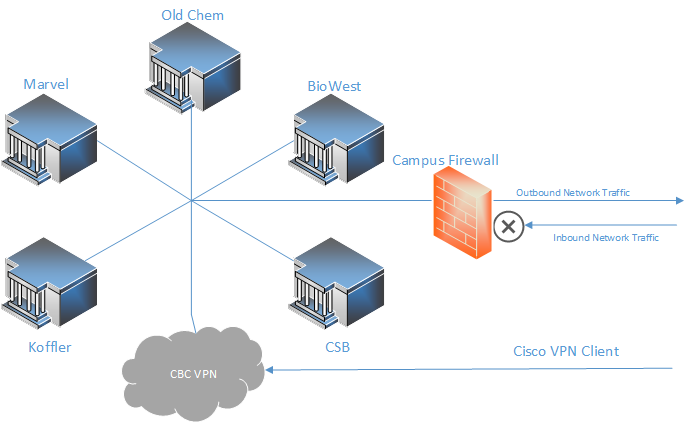
The VPN (Virtual Private Network) allows users to remotely connect to the CBC Network Subnets and behave as if they are physically connected to our local network.
|
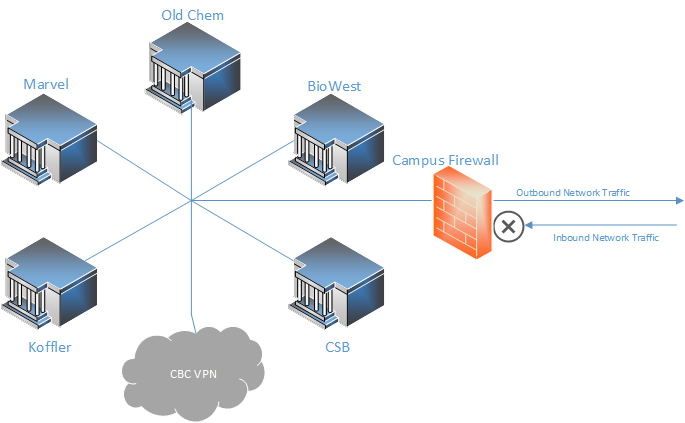
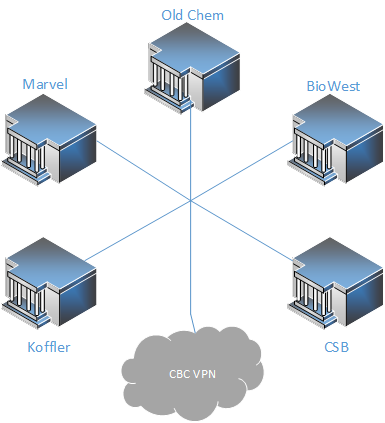
The campus divides networks into "subnets" and these are then assigned to buildings. The subnets within CBC all have open port communication to each other and allow users to freely access local resources. This is why people physically connected on-site can access our shares and server applications without any additional security. |
|
|
Network traffic is securied by a MPLS (Multi-Protocol Label Switching) Firewall. Instead of each building having its own firewall, all of the buildings are bundled behind one firewall. This allows us to communicate internally without having to "punch holes" in firewalls between the subnets. |
 |
|
When a user connects to the VPN they effectively bypass that firewall and connect directly to a subnet that is located within our MPLS Firewall. This allows them to freely communicate with departmental resources again.
There are a couple things to note when using the CBC VPN. Your local IP address will change and you are, for all intent and purposes, connected to the University of Arizona network at that point. Any online activity done while connected to the VPN will show as if it is initiated from the campus network. An example would be if someone was torrenting or illegally downloading copyrighted material while connected to the VPN, it would log as a campus entity violating copyright laws.
|
 |
Connecting to the CBC VPN
| To install the Cisco VPN Client you can visit vpn.arizona.edu in any web browser. You will be greeted with a NetID+ login. Log in via whatever NetID+ method you have set up and it will start the Java automatic installer. Please make sure the GROUP is set to 1-UASSL Client. This is how the systems knows you are there to get the VPN software and not trying to log into a existing VPN. |  |
| Click Continue past the alert. | 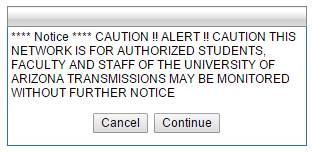 |
|
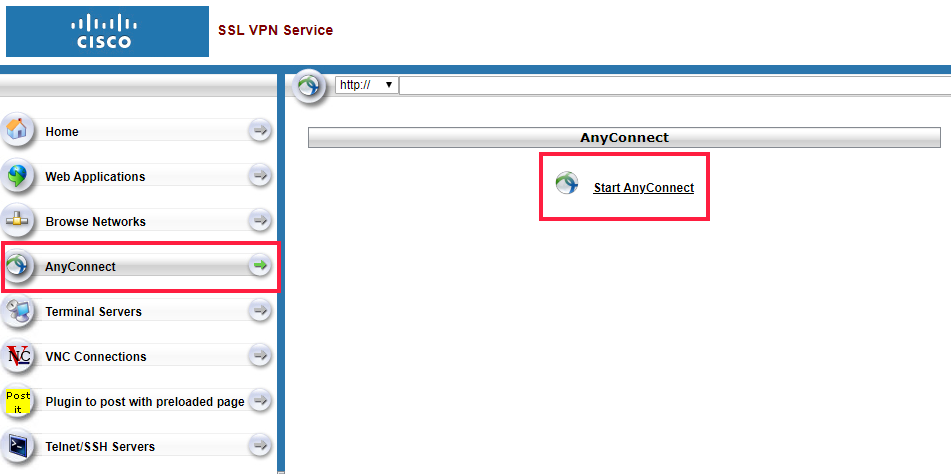
On the page you will click on AnyConnect on the left hand side, and then Start AnyConnect in the center window. You are then going to download the installer. Launch the downloaded installer and click through the install menu.
|
 |
| Now that the VPN Client is installed on your machine, you must connect. Before you can connect to the CBC VPN you must successfully connect to the default UA SSL VPN at least once. It should be listed in the VPN choice by default. If not, type "vpn.arizona.edu" (without the quotes) into the empty field. Again connect with the NetID+ method you have set up. | 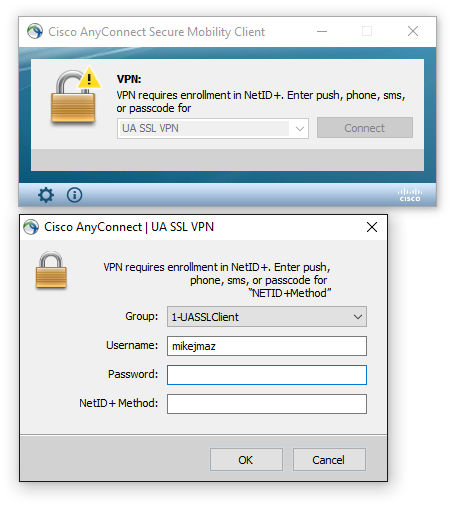 |
| Once connected you will see a lock icon with a green check. This lets you know that you have successfully connected to the UA SSL VPN. Your system will now be able to connect to department specific VPN's. Disconnect the VPN and return to the connection screen. | 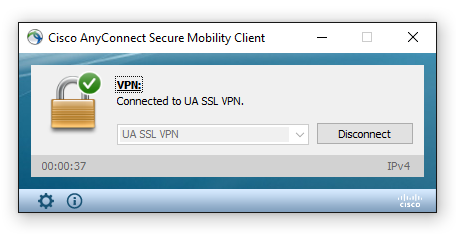 |
| You must manually enter the VPN location of the CBC VPN in the connection text area. The listing is vpn.arizona.edu/chemistry. Once you have that manually entered, click connect and go through the connection process. | 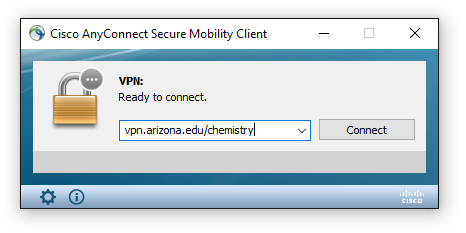 |
| After you have successfully connected to the CBC VPN, it will cache its local identification and you will now see it appear as Chemistry SSL VPN. It should be the default chioce when laucnhing the Cicso VPN client. | 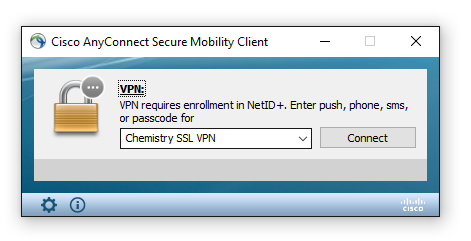 |
Please contact CBC IT if you have any problems.